
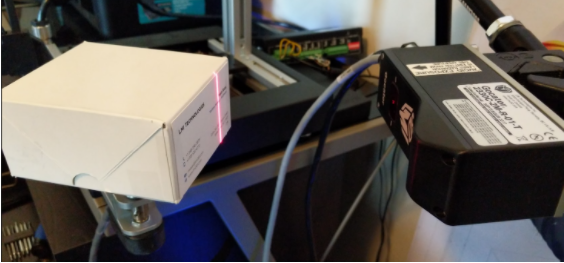
In some cases, it may be advantageous to spin a sample on a rotary stage rather than scanning it linearly.
A rectangular box presented this way would then appear to have wavy or oscillating sides rather than flat ones as shown below. This makes verifying the dimensions of the box a bit challenging.
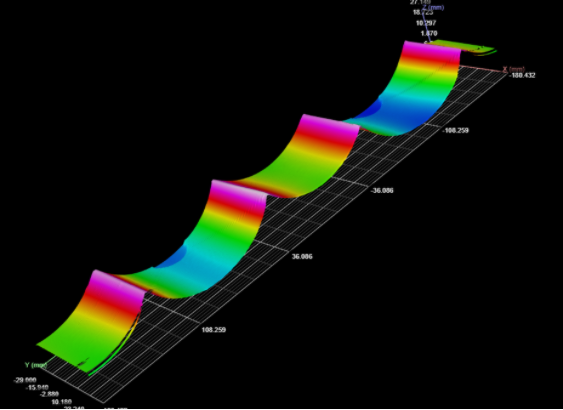
Clearly, the height of the box can be measured here as the width of the image.
In order to measure the short and long sides of the box (a.k.a. length and width), the arc length of each section must be measured from one pink ridge to the adjacent pink ridge.
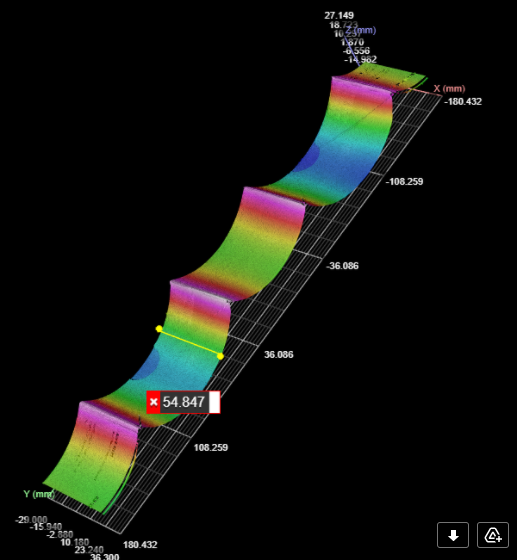
FIrst, a Surface Edge tool was used to find 1 pink ridge and ensure that an anchored Surface Section tool was perpendicular to the edges of the box. This generates the profile on which we will calculate arc length.

Then a Profile Circle was fitted to one of the curves to find its radius.
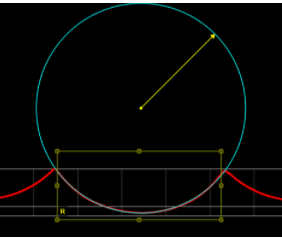
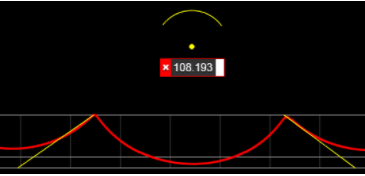
Then 2 Profile Position tools were used to find the left-hand peak and the right-hand peak, 2 Feature Create tools were used to create 2 lines from those peaks to the circle centerpoint (i.e. left peak to center and right peak to center), and 1 Feature Dimension tool was used to measure the interior angle between the new lines as the sector angle.
With the fitted circle RADIUS and the calculated SECTOR ANGLE, the arc length was calculated and interpreted as the box face length within a Script tool using the attached script contents.
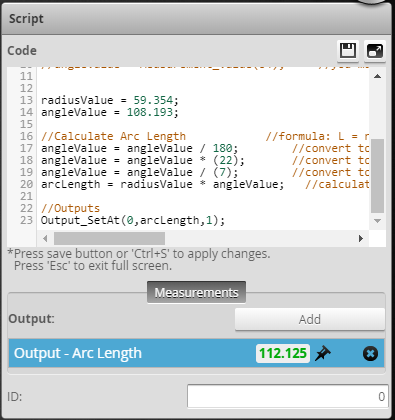
For this sample, the side length was known to be 114.3mm, i.e. 1.8% error. For general box sizing, this is a good approximation, but may not be accurate enough for some applications.
As you step through this code, you may want to verify the equation or that it works. Use an online calculator like this one from Omni Calculator. The equation used is also shown and broken down for explanation.
https://www.omnicalculator.com/math/arc-length
Comments
0 comments
Please sign in to leave a comment.